
Okay! You downloaded Chat4Us components and dependancies then you successfully installed them in your operating system. Now you can create your first chat bot.
To make it easy and fun, we are going to create a simple chat bot which will animate a capitals quiz. It will start by showing a welcome message and ask you to enter a value in order to start the quiz. The first part of this tutorial, we are going to make a static chat bot that will ask the user about the capital of a certain country, if the user answers with the correct capital, the chat bot will continue to the next one otherwize it will show an error message then repeat the same question.
Create a static chat bot quiz
Start by running Chat4Us main module ie the chat bot creator. As mentioned before, we are going to use the QA graphic editor to create static chat bot with welcome message then some few quiz questions for the user to answer with some countries capitals.
Create a new chat bot document
Create a new chat flow document by clicking the New button on the toolbar or by clicking Chatbots then New from the main menu. You can also use the keyboard Ctrl+N to create a new chat bot document.
- Click using the right mouse button on the new document and choose Add.. from the popup menu. A chat bot entry node is created.
- Double click on the new node to open the Node Editor dialog.
- Click on the text box nearby Message label then enter a welcome message like: Welcome to the country/capital quiz! Enter yes to start the quiz, other to end the chat.
- If not already done, click on the Validation tab then choose text:equal from the Type combobox. Enter yes in the condition text box.
- Click on the On success tab then write a message that will be shown to the user when the node condition is true ie: when the user answers yes. Enter a Success message: Great let’s start the quiz now!
- Let the other values to their default values as we will edit them later.
- Click on the On error tab then write a message that will be to the user when the node condition is false ie: when the user answers anything but yes. Enter a Error message: The chat is now finished.
- Set the Error Action to end then click the Save button.
Create a new node
Now that the entry node is created, let’s create the first quiz question node:
- Click using the right mouse button in a blank area on the chat bot document in order to show the popup menu then click Add…
- A new node is created. Double click on it to open the node editor.
- Enter a quiz question in the Message text box: What is the capital of Morocco?
- Choose text:equal from the Validation tab > Type combobox then enter the correct capital on the Condition text box: Rabat.
- Enter a greeting message on the On success tab > Success Message text box: Good answer! let’s move to the next one.
- Enter an error message on the On error tab > Error Message text box: Wrong answer! Try again…
- Choose repeat from the Error Action combobox so the chat bot repeats the same question to the user.
- Click the Save button to apply the changes to the selected node.
- Connect the entry node to the one created here by clicking on its success connection green dot and drag it to the this one then release it. An arrow link will appear showing that the entry node is linked to this one by the green success link.
Add the rest of the chat flow’s nodes
Add as many questions as you want to the quiz by reproducing the steps above. Dont forget to add a node that indicates to the user that the quiz is finished.
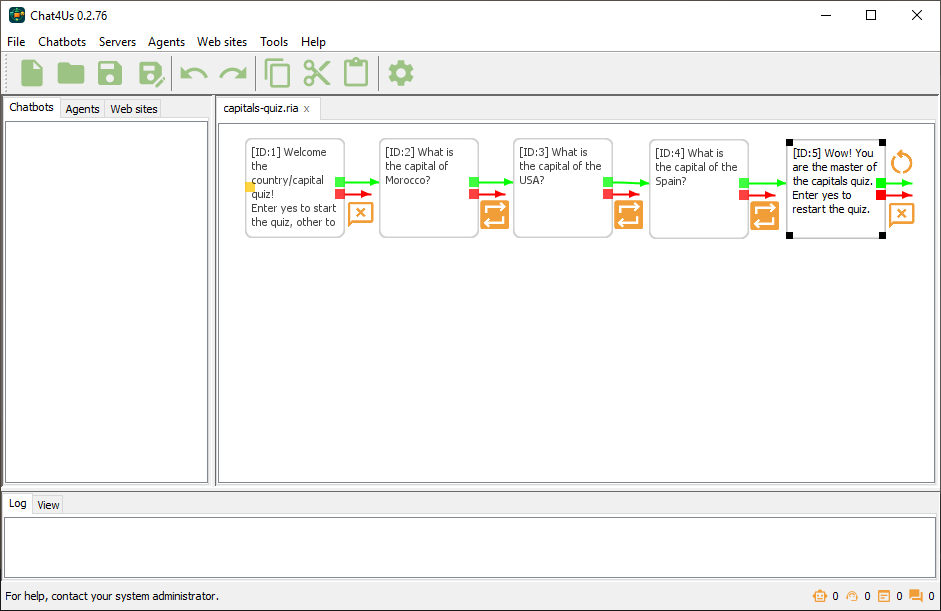
Click the Save button on the toolbar or Ctrl+S to save the new chat bot document. Give it a name like capitals-quiz.ria and click the Save button on the Save Dialog box. Your document may look like the one shown in the following screen shot.
Now that we created our first chat bot RIA document, we need to add a server that will load our chat bot into memory and handle the chat bots IFrame that we have to integrate on a website.
Create a chat bot server
On the left side of the main Chat4Us creator window, click on the Chatbots tab, click anywhere on the blank area bellow it to show the popup menu then click Add… A dialog is shown where you can fill all data needed to run a chat bot server.
- Host: localhost or 127.0.0.1 or 0.0.0.0
- Port: 8443 (Example)
- AI Group: N/A (You can create AI groups when needed)
- RIA File: Click on the […] button to choose the chat bot document capitals-quiz.ria
- AI Servers: Add GPT4All web server url. Ex: http://localhost:4891/v1/chat/completions
- Description: Capitals quiz chat bot.
- Click the Add button to add a new chat bot to the Chatbots list.
- Right click the new chat bot item on the list and activate it.
Now that we created our first chat bot RIA document, linked it to a chat bot server, we will have to allow a website access to the server in order to let users exchange messages with the chat bot IFrame.
Add a website access to the chat bot
On the left side of the main Chat4Us creator window, click the Clients tab. Click anywhere on the blank area bellow it to show the popup menu then click Add… A dialog is shown where you can fill all data needed to connect the chat bot client/IFrame to the server you just created.
- Domain: localhost or 127.0.0.1 or ::1
- IP: 127.0.0.1 or ::1
- Key #1: Enter a key or click on the Generate… button to generate a random one.
- Key #2: Enter a key or click on the Generate… button to generate a random one.
- AI Group: N/A (You can create AI groups on the Settings dialog)
- Description: Capitals quiz website.
- Copy the 2 keys as you won’t have access to them later then click on the Add button. A client/website will be added on the list.
Now that we have a running chat bot server and access credentials to it, we will procede to make some edits so the IFrame and back end PHP code can communicate with the chat bot server.
Setup website IFrame
If not done before, download the chat bot IFrame sample project and extract it into a folder when it can be read and executed by a web server like apache, nginx or other. The sample project uses HTML, CSS, JS and PHP to create and manage an IFrame that lets users exchange messages with the chat bots.
- Open web_root\WebChatClt\bot\index.php with a text editor.
- Look for variable $key1 = ‘…’; and replace the key with the Key #1 you saved when adding new website credentials.
- Look for variable $key2 = ‘…’; and replace the key with the Key #2 you saved when adding new website credentials.
- Look for variable $bot_url and replace the url with a url that points to the chat bot server we created before. In a dev machine url should be localhost:port_number.
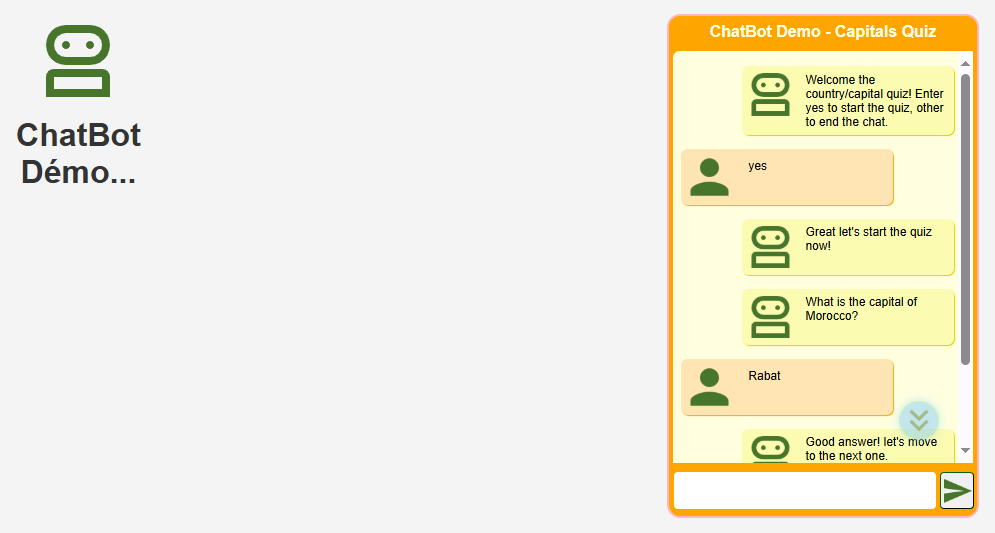
Ensure that the Chat4Us is running and the chat bot we created is activated then in your browser navigate to the web page that is integrating the chat bot IFrame. A rectangle like the one bellow should appear. Click on Start Chatting and let the capitals quiz begins.
Add an AI animator
For now, our quiz is limited to some questions and is static ie: that if you restart the quiz, it will show the same questions in the same order. And… its boring!
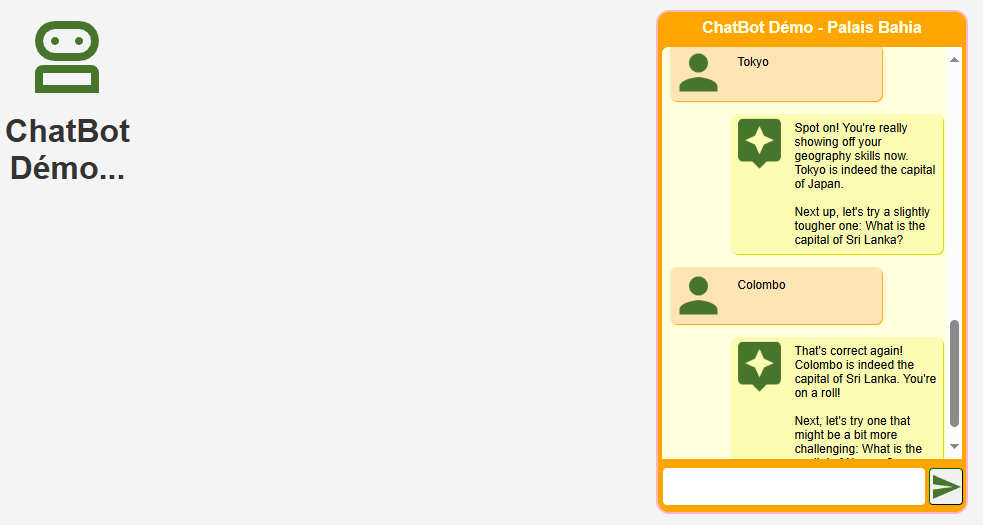
Let’s add an AI assistant as the quiz animator which will take control of the quiz make it more engaging and funny.
- Open the capitals-quiz.ria in the editor if not already done.
- If your RIA document is the same as the one shown in the screenshot bellow, remove the node ID:5.
- Double click the last node in the series of the quiz questions ID:4.
- Click on the On success tab then change Success Action to switch_to_ai.
- Click on the Save button to close the nodes editor.
- Right click on a blank area of the chat bot document editor then select Settings from the popup menu. A settings dialog will show up. Fill the following fields…
- Name: Name your chat bot.
- Guidelines: Write the guidelines that AI assistant should respect while animating the quiz. For example: You are an AI assistant that is animating a countries/capitals quiz. Keep the quiz funny and the user engaged.
- Move to the Params tab and the following keys/values:
- gpt4all_model: Llama 3.2 3B Instruct
- gpt4all_max_tokens: 512
- gpt4all_temperature: 0.5
- Click on the Save button to close the dialog.
- Save the RIA document.
- Click on the Chatbots tab in the left view then right click on our running chat bot server to show the popup menu and select Deactivate.
- Right click again on the chat bot server and select Activate the chat bot server so as to reload the new version of capitals-quiz.ria file.
- Ensure that GPT4All and its API server are running and Llama 3.2 3B Instruct is downloaded.
| ⚠ | In a slow machine, GPT4All may take long time to generate a response. The chat bot may fail responding to the user especially when generating the first response as it has to load the model from disk to memory then start generating… |
What’s next?..
For the static questions, you can enhance questions format using HTML tags. Add possible responses using buttons templates. A clickable button will be shown which user can click to send the response to the chat bot server. For example:
<a id=”btn_snd_Response_text” class=”btn_snd” href=”#”>Response text</a>
Now there’s more fun taking the quiz. You can remove the first static questions to let the AI animator takes the full control of the quiz. You can also try a better version of the guidelines. Also try to finetune the gpt4all_temperature value for better results.
If you are a developper who want to integerate a chatbot into your website or app, navigate to the following tutorial for more details about how to develop your own chatbot client.